
If you were to ask me how many running shoes I’ve owned since I started running, I couldn’t even begin to tell you.
It’s been a lot.
Tons, maybe.
Runners can relate, yes?
Very early on as I started to run marathons, I learned that you have to switch out your shoes after they’ve reached a certain mileage or you risk injury by running in shoes that are too worn out.
I’ve been tracking them ever since.
No matter what running log I was using at the time, whether it was Garmin Online, the Nike app, or web-based trackers such as Daily Mile, I would sit down every couple of months and manually add up how many miles I’ve run in any one particular shoe I was wearing.
It was a time consuming process, but I was pretty set in making sure I was tracking every mile.
Of course, I don’t depend on an app exclusively to tell me when to switch out my running shoes. Eventually, my feet and legs would let me know when it was time for new shoes.
Other signs of wear and tear:
- If I press my finger into the center of my shoes from the inside and it feels really firm, or the cushion doesn’t “bounce back”
- I check the removable sole for any signs of wear
- Look for signs of wear on the bottom of my shoes
- Look for any tears in the outside fabric of my shoe
Despite the obvious signs of overuse on my shoes, it’s been really helpful to have apps like Strava around to help keep track of my gear when I’m busy getting the miles in.
No more adding up my miles for each of my shoes by hand. Yay!
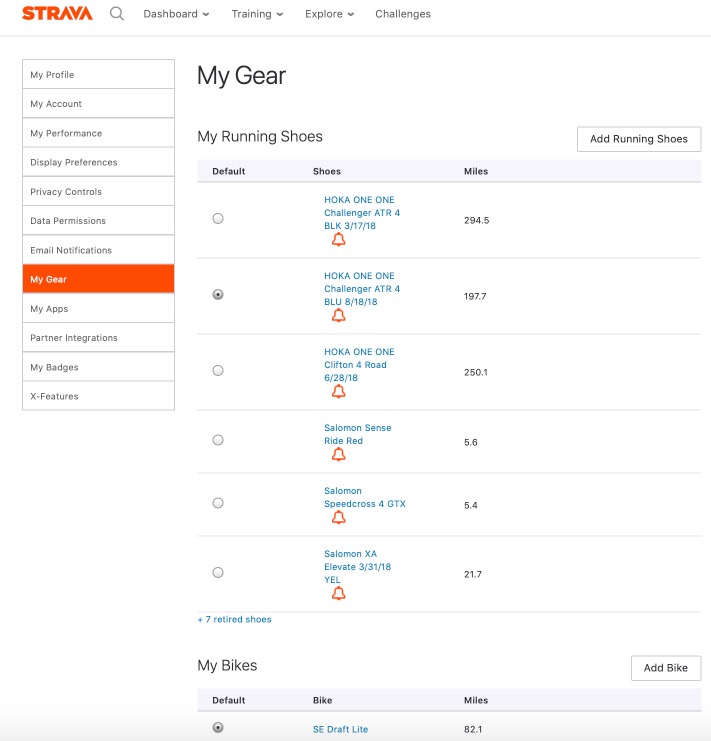
Currently, I’m rotating between five different running shoes:
- Hoka One One Challenger ATR: My #1 choice in trail shoes.
- Hoka One One Clifton: My road shoes.
- Salomon XA Elevate: I love this one for speedwork on the trail.
- Salomon Speedcross 4 GTX: For the mean, muddy, rain-soaked trail where I need the ultimate traction.
- Salomon Sense Ride: I love these for every day wear.
How I track my running shoes using Strava on the web
1. Log in to Strava.com in a web browser.
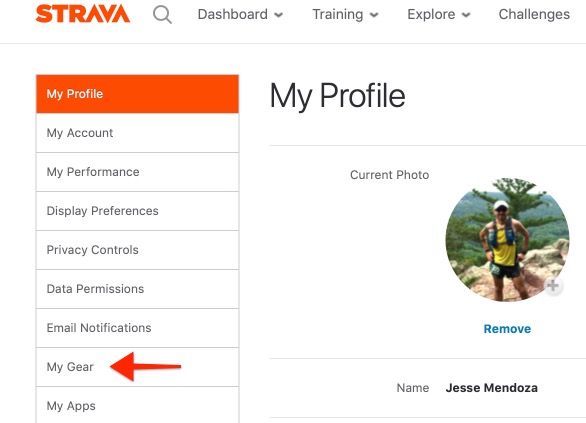
2. Click on the photo icon in the upper right and select Settings.

3. Select My Gear in the left column.
4. Select Add Running Shoes.
5. Select the brand of shoes I’m adding.
6. Type in the model of the shoe.
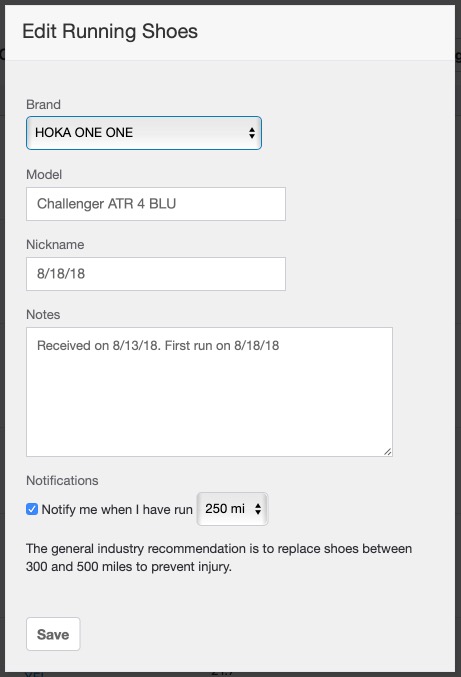
I like to keep the model description as short as possible so that it will show correctly when viewed using the Strava app on my iPhone.
I also include the color of my shoe if I have multiple of the same model of shoe.
7. Give it a Nickname.
I type in the date I purchased the shoes in this box or the date of the first time I ran in them.
At the bottom, I can select when I want to be notified as a shoe reaches a certain mileage limit. I like to choose something between 250 and 350 miles.
8. Add a Note.
I’ll put a description in here that will help me remember things like when I bought my shoes, the first time I ran in them, or even the price. Yes, I’m a shoe nerd like that!
9. Click Save.
How I track my running shoes using Strava for mobile (iOS)
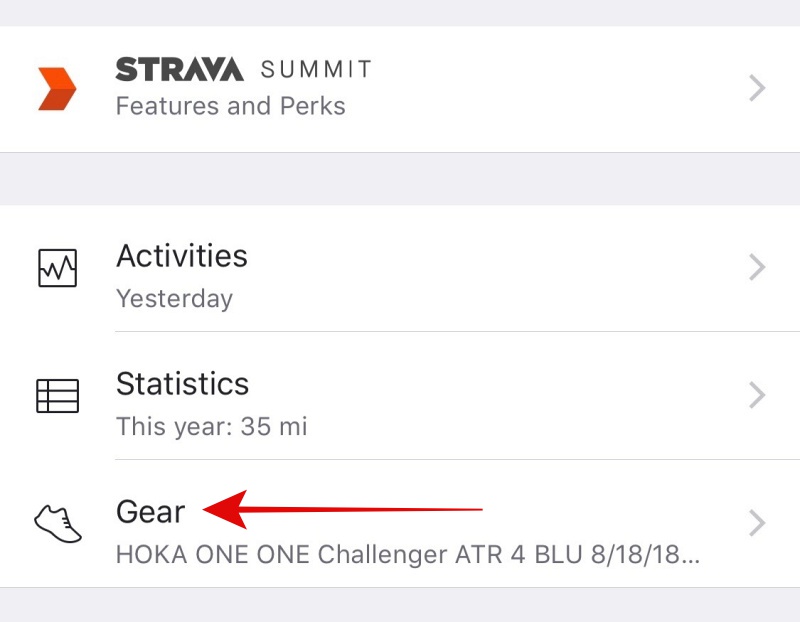
1. In the Strava for iOS app tap the Profile button at the bottom.

2. Scroll down to the Gear section and select it.
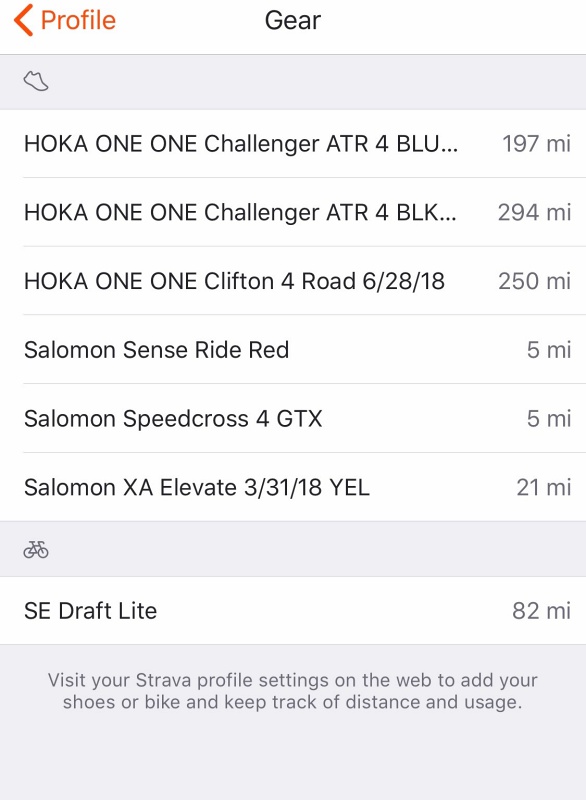
4. In the Gear list, I’m able to see the shoes I have entered and the mileage for each one (Bikes also go in here).
Once I’ve completed a running workout, I can edit my activity in the app and tap on the “Shoes” section and select the type of shoes I worked out in.
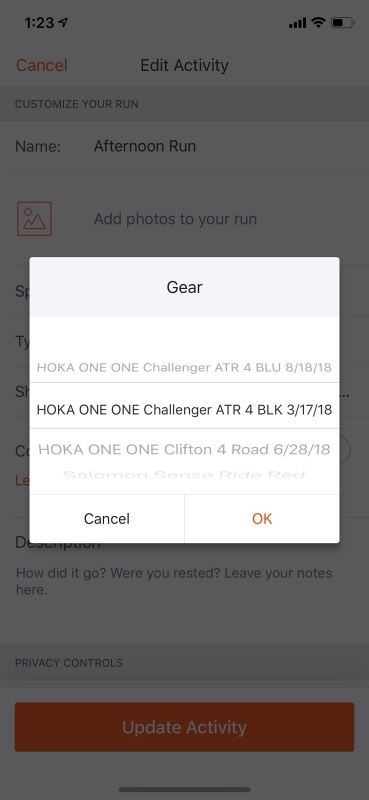
You can see how keeping the shoe descriptions short helps with being able to view it correctly on the small phone screen.
This all may be a little over the top if you don’t care much about how many miles are on your shoes, but as someone who’s been tracking this since day one, it’s been a huge help.
This posts contains affiliate links. Check out my disclosure policy for the deets. All photos are my own unless specified.